Graphic Organizers and Data Representations

Graphic Organizers and Data Representations

In the 3rd – 5th grade Girls Who Code clubs, the emphasis is less on learning a particular coding language and more on CS principles, core concepts, and computational thinking. Building their own graphic organizer can be a foundational activity because the kids see how different types of data are better suited for different display types.

And I just love flippity.net for these tasks. It’s both a great tool for students and teachers, with a UI that is simple and flexible.

Flippity starts with a google spreadsheet, where the A and B columns are questions and answers (or answers and questions, depending on what you’re building). You can import something that you already made for another project, or whip it up from scratch. After publishing the spreadsheet, it then generates any of a dozen or so graphic organizers from your data. And many of the options are interchangeable, so you can view one spreadsheet via multiple representations. The basics are flash cards, BINGO cards, matching cards, and self-paced quizzes. On the more creative side, there are cross-word puzzles, word searches, and quiz shows. There are also a couple of features aimed at teachers and classroom management, like random name pickers, random group assignments, and seating charts.

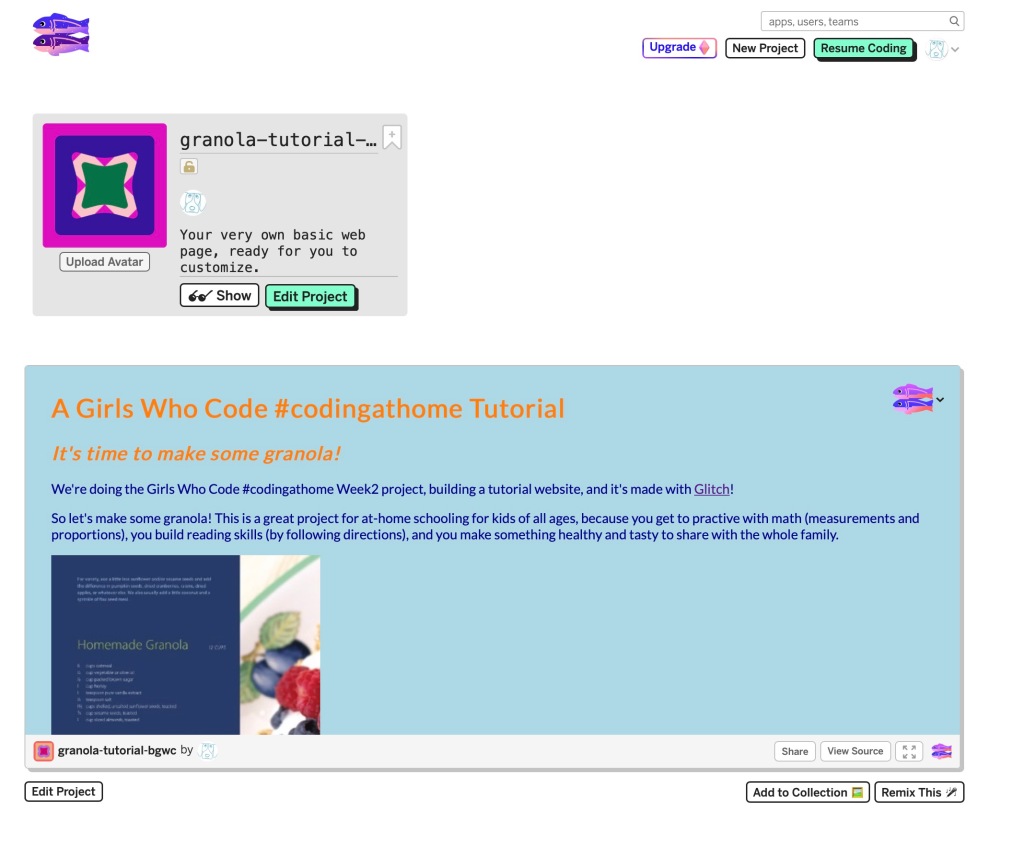
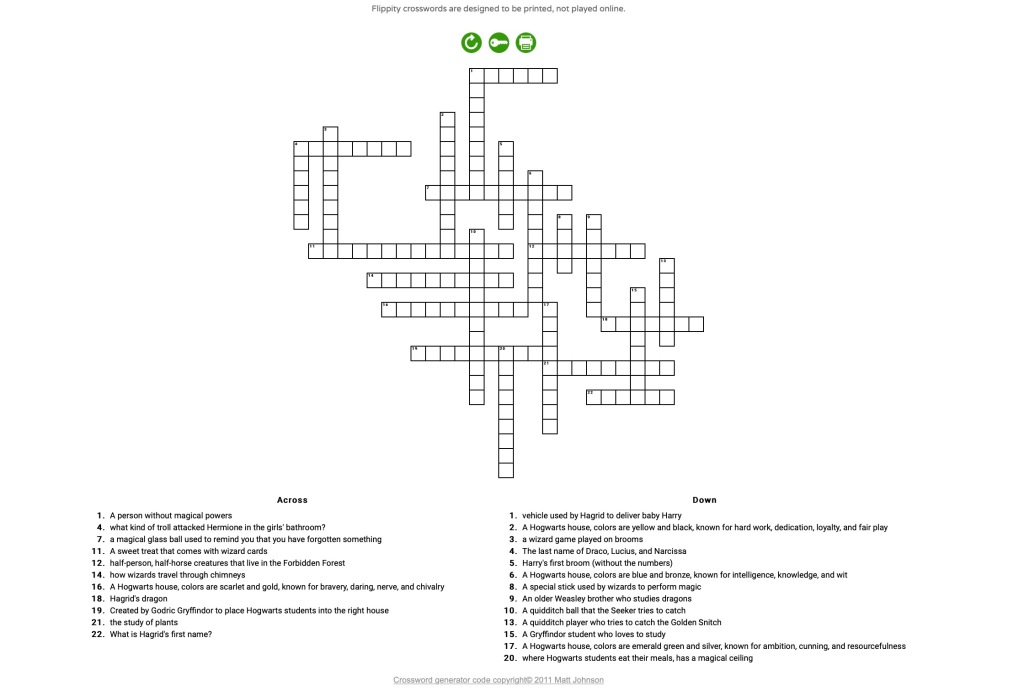
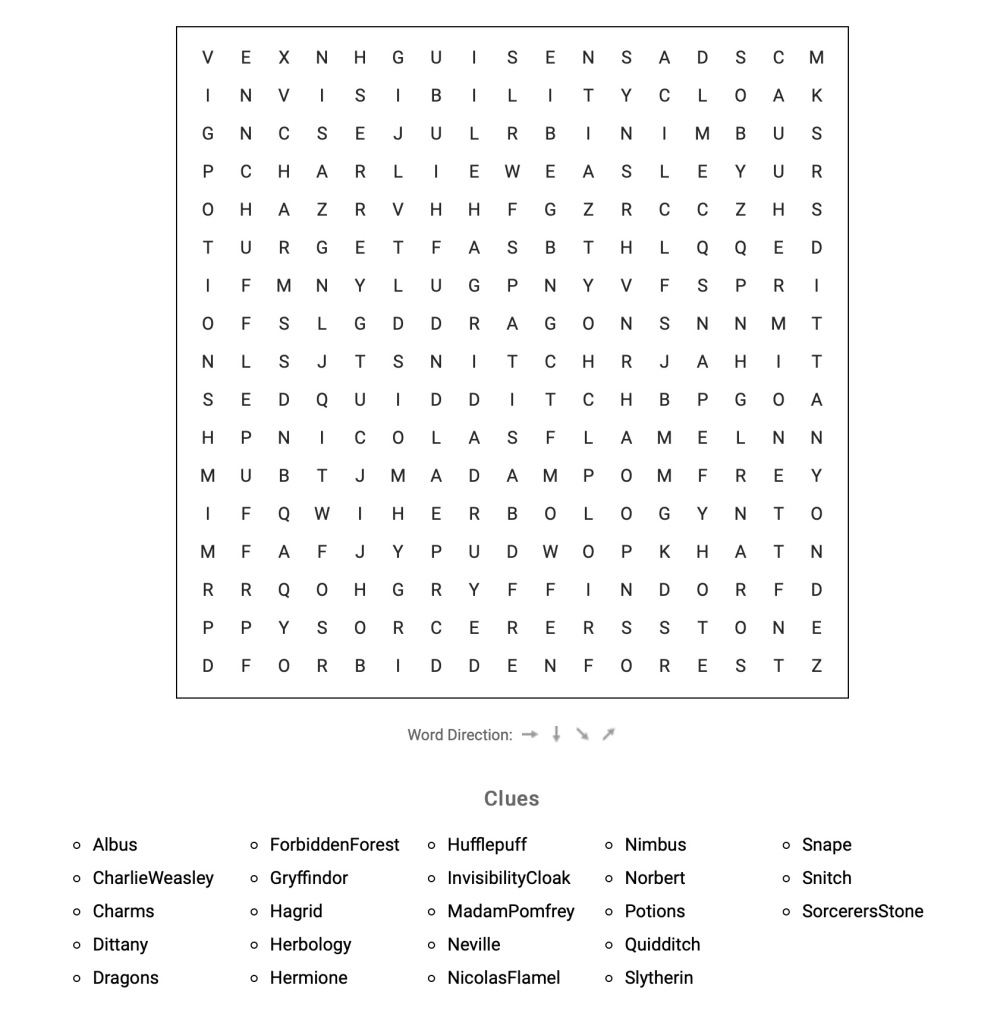
Here are some examples that we’ve been playing around with. We’ve been re-reading Harry Potter and the Philosopher’s Stone over at Wizarding World. Wizarding World has quizzes and projects to go along with each chapter, but with flippity, it’s just as easy to make your own.

Let’s start with a crossword puzzle, and if you’re following along in real time, this should take about 5 minutes. You start at flippity.net and open the “instructions” tab on the crossword button. Give it a quick read, then click the “template” link in Step 1.

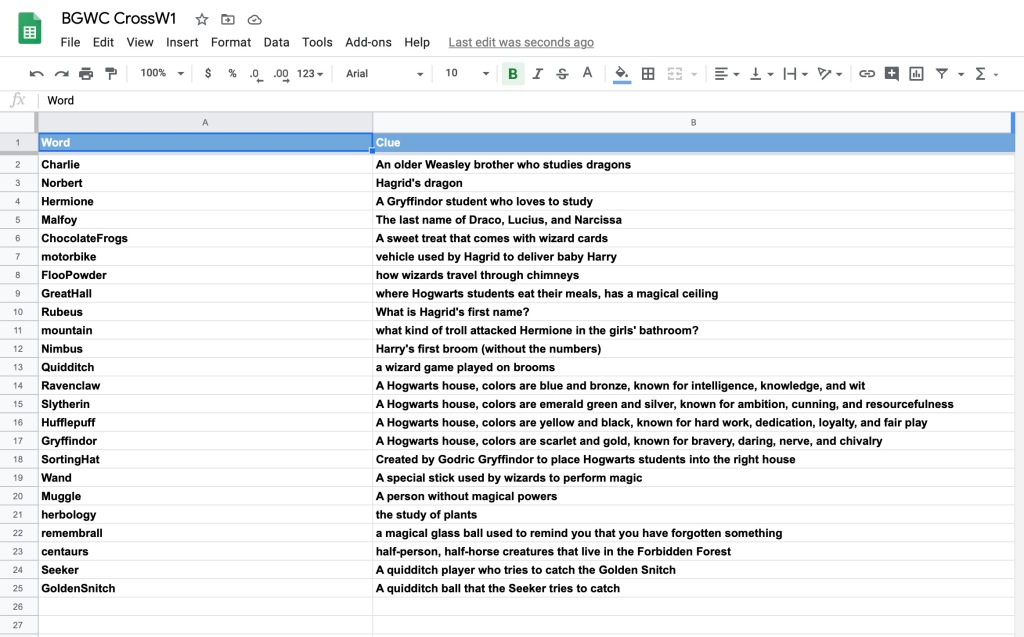
Before you do anything else, rename the file. Then enter as many terms as you want in the A column (“word”) and a hint or definition in the B column (“clue”). When you’re done, go to File —> Publish. After publishing, switch from the Demo tab (at the bottom of the page) to the “Get the link here” tab.

Click that link, and you now have a crossword puzzle that you can either share from the final destination page or by sharing the supporting spreadsheet. Want to change or update it? Because it’s a published Google Sheet, any changes are automagically updated. Or, create a copy and build a new puzzle.

Building a cross-word puzzle takes all of five minutes with flippity.net

Some examples you can copy and reuse:

Beginner’s Harry Potter Crossword

Wizarding World Word Search

BINGO Card for Chapter 14, Philosopher’s Stone (used for practicing listening skills — they mark off a word when they hear it while listening to the audiobook at Wizarding World)

After making a couple of these for the kids, they were able to use the app themselves to make puzzles for each other, reinforcing a lot of the concepts that they have learned in Bacon’s technology classes.

Good luck, have fun, and let me know if you ran into any problems, have any questions, or have some cool ideas to share. And don’t forget to check out our other lessons plans here.

GWC Code at Home

Have you been trying any of the weekly Coding at Home activities? I’ll admit, stay-at-home schooling has taken up a way bigger chunk of the day that we had expected when we started this new normal thing. This weekend we made a point of trying one of the longer projects, and I think it’s one that everyone can have some fun with.

Girls Who Code has made these projects available for everyone, so you don’t even need to log into your HQ.GirlsWhoCode account. Start out at the Coding at Home page, and scroll down until you see this:

During uncertain times, it’s important to take a break to focus on and share something that brings you joy! Learn how to use HTML and CSS to build a tutorial that teaches someone how to do something like how to make a TikTok, how to draw a cat, how to make your favorite cookies (our project was making homemade granola), how to land a perfect water bottle flip – no skill is too small! 

Here’s a run-down of the project:

  • Brainstorm you project. Think of a skill that you want to share, and how you want to explain it. Maybe it’s just a list, maybe you need lots of pictures. Are there supplies needed? What kind of preparation do you need, both to explain the project and to follow the instructions?
  • Open a project in Glitch. Take a few minutes to read their getting started page. Then open a “new project,” select “Hello, Webpage,” and check out the README.md file. Glitch is a powerful tool for collaborative app development, but all you really need to know right now is that it lets you live-preview your work as you code. As you add HTML elements, they just show up in a preview window.
  • Intro to HTML. Just follow the steps in the GWC tutorial. Keep it simple. Play around by copy/pasting some text in the existing HTML tags, then changing the tags
  • Intro to CSS. Again, keep it simple. For a starter project, just play around with changing colors and maybe fonts. The project page shows links to W3Schools and Mozilla, but for this week I’d recommend just sticking with the examples on the GWC tutorial.

Here’s what we built this weekend: a recipe page for our award-winning homemade granola.

Like I just said, we kept it simple … very simple. On the HTML side, it’s just paragraphs and unordered lists, and the CSS only changes the background and font colors. The plan is to continue styling it over the next few weeks, add pictures to demonstrate the steps, and then move on to learning about page layouts.

If you want to give it a shot but need help getting started, then give us a shout on Teams. Look up Hope in the directory and we can go over some common stumbling blocks.

And, hey, if you don’t have time to try this yourself … well, then just enjoy the granola!

Using Conditionals in Scratch

This is one of the foundation lessons that everyone using Scratch needs. Conditionals are what gives your code the power to react and respond. If something happens (in your game, or in the real world through a sensor or user input), then a certain response is triggered. And you can learn all about them in a 30 minute exercise in your HQ.GirlsWhoCode account.

Or, start with your Girls Who Code account, and then go to the Scratch Tutorials link on the left hand column, near the bottom.

It helps if you can use two screens, like a tablet next to a laptop. But if you only have one, then open two browser tabs, and switch back and forth between the GWC tutorial page and your Scratch page.

Tutorial Page

Getting started with Scratch

Scratch is an amazing learning and development environment, but it has one problem: getting started. Like any ecosystem in which users are encouraged to share their work, there are thousands of great examples of easy to follow projects, but there are millions of not-so-great examples, and it’s hard to tell which is which until you’ve messed around under the hood for a while.

That’s where the public library comes in. If you have a Poudre River Library card, you’re in luck.

Before you click the link, however, the have to create an account with Lynda.com through your Poudre River Public Library account.

Starting at the beginning …

1) Log into your PRL account: https://www.poudrelibraries.org/

2) Click the green “Research” tab and scroll down to Lynda.

3) Find your library card number. You’ll need it to create a Lynda account.

(This step might be a little annoying. Your card number is in “My Account” in the library app, but not on the website. So you might need to find your physical library card.)

4) Create a Lynda account.

5) Search for “Scratch” or go to https://www.lynda.com/Scratch-tutorials/First-Look-Scratch-3-0/2804663-2.html?org=poudrelibraries.org

Lynda also has courses on Raspberry Pi, Arduino circuits, Swift Playgrounds, and other fun stuff, so it’s a great resource, and you’re saving $30/month by having a library card.